Master Setup — Standalone#
This guide walks through installing Ubuntu Desktop 24.04 LTS, ROS 2 Jazzy, and all dependencies on a standalone desktop computer with a single local Ubuntu account. This computer system is utilized in the United States Air Force Academy’s Electrical and Computer Engineering department in an embedded network with the ground robot, a TurtleBot3 Burger. The master system is used to run ROS GUI tools and create secure connections with the TurtleBot3.
Use this guide for a single master with a local Ubuntu account. If you are setting up the centralized multi-student lab (shared logins across many masters), see Login Server Setup and Master (Client) Setup instead.
This guide is adapted from the TurtleBot3 e-Manual.
Hardware#
For our application, we are using Intel NUC Kits but these instructions will work on any AMD64 architecture.
Software#
Ubuntu 24.04#
For the desktop machine you will first need to download Ubuntu Desktop 24.04 LTS.
Once downloaded, follow the instructions to create a bootable Ubuntu USB stick within Ubuntu. The guide provides links to create USB sticks from Windows and macOS as well.
Once the bootable USB stick is created, follow the guide to Install Ubuntu desktop selecting a useful computer name such as master0. The NUC requires you to press and hold F10 on startup to boot from a USB stick.
Update Alternatives#
Python3 is installed in Ubuntu 24.04 by default. Some packages utilize the python command instead of python3 so we need to create a new executable, /usr/bin/python that will call Python3 (basically use the command python to call Python3):
sudo update-alternatives --install /usr/bin/python python /usr/bin/python3 10
After running this command, /usr/bin/python will point to /usr/bin/python3 with a priority of 10, allowing us to set and manage different versions of Python easily.
ROS2 Jazzy#
At this point, the Ubuntu environment is set up. Now we will install the ROS 2 requirements for the master. All of these instructions are adapted from the ROS 2 Documentation: Jazzy. ROS 2 Jazzy is the ROS 2 release that supports Ubuntu 24.04 LTS (Noble Numbat).
Installation#
Follow the official ROS2 documentation to install ROS2 Jazzy.
For most Linux users, the Debian package installation method is strongly recommended.
Install
ros-jazzy-desktop.
sudo apt install -y software-properties-common curl

sudo curl -sSL https://raw.githubusercontent.com/ros/rosdistro/master/ros.key \
  -o /usr/share/keyrings/ros-archive-keyring.gpg

echo "deb [arch=$(dpkg --print-architecture) signed-by=/usr/share/keyrings/ros-archive-keyring.gpg] \
  http://packages.ros.org/ros2/ubuntu $(. /etc/os-release && echo $UBUNTU_CODENAME) main" | \
  sudo tee /etc/apt/sources.list.d/ros2.list

sudo apt update
sudo apt install -y ros-jazzy-desktop ros-dev-tools
ros-dev-tools already bundles colcon, rosdep, and vcstool, so a separate python3-colcon-common-extensions install is no longer needed on Jazzy.
Install ROS dependencies for building packages:
# Gazebo Classic is end-of-life and is not packaged for Jazzy. Jazzy pairs with
# Gazebo Harmonic, integrated through the ros_gz vendor packages.
sudo apt install -y ros-jazzy-turtlebot3*
sudo apt install -y ros-jazzy-ros-gz
sudo apt install -y ros-jazzy-usb-cam ros-jazzy-image-proc ros-jazzy-v4l2-camera
sudo apt install -y ros-jazzy-camera-calibration
sudo apt install -y ros-jazzy-apriltag ros-jazzy-apriltag-ros libapriltag-dev
sudo apt install -y python3-pip python3-venv
sudo apt install -y tree
sudo apt install -y terminator
sudo apt install -y jstest-gtk
sudo apt install -y obs-studio qtwayland5
Create a ROS workspace:
mkdir -p ~/master_ws/src
cd ~/master_ws/
TurtleBot3 Simulation Package#
cd ~/master_ws/src/
git clone -b jazzy https://github.com/ROBOTIS-GIT/turtlebot3_simulations.git
cd ~/master_ws && colcon build --symlink-install
ROS Environment#
Set up ROS environment variables and setup scripts within the ~/.bashrc file. Open the ~/.bashrc file with your favorite command line editor and add the following to the bottom:
alias gedit='gnome-text-editor'

# Launch the TurtleBot3 bringup on the robot over SSH.
alias bringup='ssh pi@192.168.50.1 '\''ros2 launch turtlebot3_bringup robot.launch.py'\'

# Shortcut to SSH into the robot.
alias ssh_robot='ssh pi@192.168.50.1'

# Build the workspace, passing through any colcon arguments
function ccbuild() {
    cd ~/master_ws && colcon build --symlink-install "$@"
    source ~/master_ws/install/setup.bash
}

# Export the function so it is available in subshells
export -f ccbuild

# Source the ROS2 Jazzy environment so ros2 commands are available
source /opt/ros/jazzy/setup.bash

# Source the student's own workspace if it has been built
# The "2>/dev/null || true" suppresses the error if the workspace doesn't exist yet
source ~/master_ws/install/setup.bash 2>/dev/null || true

export TURTLEBOT3_MODEL=burger
export RMW_IMPLEMENTATION=rmw_fastrtps_cpp

# colcon helpers
source /usr/share/colcon_cd/function/colcon_cd.sh
export _colcon_cd_root=/opt/ros/jazzy/
source /usr/share/colcon_argcomplete/hook/colcon-argcomplete.bash

# ROS_DOMAIN_ID separates ROS2 traffic between different robot pairs.
# It MUST match the value set on the robot, which equals the robot number
# (robot7 -> 7). A mismatch means the master sees no topics at all, and there
# is no error message. Change this to your robot's number.
export ROS_DOMAIN_ID=99
export LDS_MODEL=LDS-02 # replace with LDS-03 if using new LIDAR
Any time you make changes to your ~/.bashrc file you must source it:
source ~/.bashrc
Visual Studio Code#
Install from the .deb rather than the snap. The snap runs confined and has trouble reaching serial devices and the ROS environment; the .deb is an ordinary system package.
wget -O /tmp/code.deb 'https://code.visualstudio.com/sha/download?build=stable&os=linux-deb-x64'
sudo apt install -y /tmp/code.deb
rm /tmp/code.deb
The package registers Microsoft’s apt repository and signing key itself, so future versions arrive through sudo apt upgrade like anything else. There is no need to add the repository by hand first — doing both produces a duplicate source and a wall of configured multiple times warnings on every apt update.
If VS Code was previously installed as a snap, remove it so the two do not compete for the code command:
snap list | grep code && sudo snap remove code
Verify:
code --version
which code          # expect /usr/bin/code
apt-cache policy code
apt-cache policy should list a single origin at packages.microsoft.com. If it shows two, there is a leftover hand-made source file:
sudo rm -f /etc/apt/sources.list.d/vscode.list    # keep vscode.sources
sudo apt update
File watcher limit#
VS Code watches every file in an open folder. A built master_ws contains tens of thousands of files across build/ and install/, which exceeds the default inotify limit and produces a “file watcher limit reached” error.
Raise the limit:
echo "fs.inotify.max_user_watches=524288" | sudo tee /etc/sysctl.d/60-inotify.conf
sudo sysctl -p /etc/sysctl.d/60-inotify.conf
Better still, stop watching the build output entirely — ccbuild regenerates it, so there is nothing worth tracking. Add to the workspace’s .vscode/settings.json:
{
  "files.watcherExclude": {
    "**/build/**": true,
    "**/install/**": true,
    "**/log/**": true
  },
  "search.exclude": {
    "**/build/**": true,
    "**/install/**": true,
    "**/log/**": true
  }
}
search.exclude matters as much as the watcher setting: without it, a project-wide search returns thousands of hits from compiled artifacts and symlinked headers.
TP-Link AC600 Archer T2U Plus Driver#
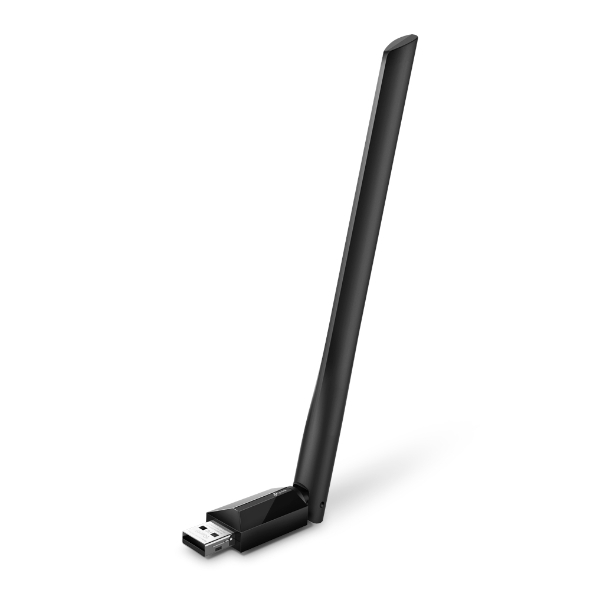
Check before installing. The Archer T2U Plus line has shipped with different Realtek chipsets across hardware revisions (RTL8812AU or RTL8821AU), and RTL8812AU only recently gained proper in-kernel support (via the
rtw88driver, merged around Linux 6.14). Ubuntu 24.04 LTS ships kernel 6.8 by default — whether your install already has a new enough kernel depends on which HWE point-release kernel it has picked up. Rather than assume, check first: if the adapter already works out of the box, skip the driver build below.
Ensure the wireless dual-band USB adapter is plugged in.
$ lsusb
Bus 005 Device 002: ID 2357:0120 TP-Link 802.11ac WLAN Adapter
Install the driver with these commands:
sudo apt install git dkms
git clone https://github.com/aircrack-ng/rtl8812au.git
cd rtl8812au
sudo make dkms_install
If
make dkms_installreports a permission error, do notchmod 777the source tree – that does not fix the build and leaves it world-writable. The usual causes are a leftover half-finished DKMS build or cloning into a directory root cannot read:# Inspect and clear any previous build, then retry from your home directory sudo dkms status sudo dkms remove rtl8812au/5.6.4.2 --all # match the version from dkms status cd ~ && rm -rf rtl8812au git clone https://github.com/aircrack-ng/rtl8812au.git cd rtl8812au && sudo make dkms_install
PIP#
Ubuntu 24.04 enforces PEP 668, which blocks pip from writing into the system Python. A plain sudo pip install <package> fails with an externally-managed-environment error.
The protection exists so that pip cannot break Python packages other apt-managed applications depend on. A master runs ROS 2 and nothing else, and is re-imaged rather than repaired, so installing system-wide is acceptable here. Use --break-system-packages to say so explicitly:
sudo pip install --break-system-packages "pydantic<2"
sudo pip install --break-system-packages imutils
sudo pip install --break-system-packages pupil-apriltags
dlib is handled separately – see below.
Building a dlib Wheel#
Why not just pip install dlib? Because dlib is a C++ library. PyPI ships it only as a source distribution, so pip install dlib downloads the source and invokes the compiler, which takes 30-60 minutes on a NUC and needs cmake, a full build toolchain, and a few GB of RAM.
A wheel (.whl) is a zip archive of the already-compiled result. Building one once and installing it everywhere else turns a 45-minute compile into a 5-second unzip. The reasons this is worth doing:
Time. Fourteen masters at 45 minutes each is over ten hours of compiling. One build plus thirteen copies is under an hour.
Reproducibility. Every machine gets a bit-identical binary. Compiling separately on each machine invites subtle differences from compiler versions or detected CPU features – the kind that produce a lab that works at one bench and not another.
Re-imaging. Machines get wiped. Keeping the wheel means a rebuild costs seconds instead of another 45-minute compile.
No build tools at install time. Only the machine that builds the wheel needs cmake and the toolchain.
Step 1 – build the wheel (once, on one master):
# Build dependencies, needed only on this machine
sudo apt install -y build-essential cmake python3-dev

pip install --break-system-packages wheel
pip download dlib
python3 -m pip wheel dlib-*.tar.gz
This produces a file such as dlib-20.0.0-cp312-cp312-linux_x86_64.whl.
The filename is a compatibility contract, and it must match the target machine.
cp312means CPython 3.12 andlinux_x86_64means 64-bit Intel/AMD. A wheel built on a robot is taggedlinux_aarch64and will not install on a master – pip will reject it, or worse, ignore it and fall back to compiling. Build one wheel per architecture: one for the masters, one for the robots.
Step 2 – keep the wheel somewhere durable. Not the machine that built it, which will eventually be re-imaged. The login server works, or the course git repo if you do not mind the file size:
scp dlib-*.whl ece387admin@ece387server:/srv/ece387/wheels/
Step 3 – install on any master:
sudo pip install --break-system-packages ~/dlib-*.whl
Verify:
python3 -c "import dlib; print(dlib.__version__)"
The robots use a virtual environment instead (see Robot Setup) because that setup already exists and works. There is no need to make the two match.
For each user:
sudo adduser $USER video
Then, reboot the system.